Sunday, April 27, 2008

Thank You, Thank You

I've done enough knitting and crocheting in the past couple of days, I decided that today it would be time to play with some paper. I am part of an exchange coming up, and the theme is "thank you / congratulations", so I had to come up with something to fit one of those messages. At first I intended to make a masculine-hued congratulations card, but my idea just didn't pan out. So, it turned into a thank you card instead. I'm not even sure it's all that masculine, what with the flowers and all, but I think I like it anyway. I'm really diggin' the retro brown-blue-olive-mustard colour scheme though, I like how it doesn't really match, but it still works together. And the velvet ribbon is the perfect finishing touch.

I think I'm happy with the result. I may tinker with it a bit more for the final exchange version, but I'm at least pleased with my prototype!


Stamps: Stampin' Up Enjoy Every Moment
Paper: SU Chocolate Chip, Old Olive, misc white, Deja Views Small Polka Dots.
Ink: SU More Mustard, Old Olive, Bordering Blue
Other: Corner rounding punch, ticket corner punch, brown velvet ribbon, misc eyelets, SU pastels
Friday, April 25, 2008

Ahhh, Organization! Part I

Those who know me know that I am not exactly the most organized person in the world. I toss things in piles, bags, drawers - anything to just get it out of the way when I'm tidying up. This resulted in a huge, and I mean HUGE mess when it came to my knitting and crocheting. Yarn and needles and hooks every which way! I had no idea what I had, and looking for it became an ordeal. And my husband, being thrifty, forbade me to buy anything remotely knitting- or crocheting-related until I sorted out the mess. He feared (and rightly so) that I would just buy what I already had, because I had no idea what I had already bought. Smart man.

So, I organized. I'm still in the middle of organizing my yarn and patterns - that will be a blog entry for later - but first I wanted to share what I started working on last night, and miraculously finished this morning. I spent the better part of my afternoon yesterday looking at needle & hook storage solutions on ebay, etsy, and several other sites that came up with the help of Google. I found a couple patterns, several pictures, and a truckload of inspiration. So, I went to work, and this is what I finished!


It will hold several pairs of needles, and the bottom pockets are wide enough to store other accessories. I have my crochet hooks in it for now, but I have plans to make another smaller holder specifically for them. That's on my to-do list.

I can't take full credit for it - I did base it mostly on some stuff that I found while googling around, particularly the pocket placement. And it does look an awful lot like the ones I saw for sale on etsy. It's not perfect, either - I made several mistakes (thankfully all not noticeable!) while making it, and made some notes on what I need to do differently to perfect it. All in all, it was a good start, is functional and pretty, and I will surely make more to give as gifts, and possibly even a few to sell.
Thursday, April 24, 2008

All Warm & Fuzzy

Hi, my name is Samantha and I am addicted to making cute things for my kid. And my friends' kids. Really, anyone under the age of 12. This is another freebie pattern that I picked up somewhere in my travels, and absolutely count not resist trying. It's super-duper easy, and crochets up in a flash. The only problem I found was that you switch colours every single round, so that's a lot of yarn hanging around on the couch with you that is at eye-level for curious children and cats. Several times I had to fend off sticky fingers and poking paws whilst finishing this up!

So, the details of the pattern. It's a freebie from Bernat, the Cute Kids' Earflap Hat (registration required to view the pattern). This one was done in Bernat Softee Chunky in Hot Pink and Hot Lime. I did it pretty much word-for-word, with the exception of changing up the colours, and doing a two-colour tassel instead of one. The one I made is a size 2/4, and it's not too terribly large on my 10-month-old, but definitely stretchy enough to fit an older child.

One thing I did do was change my single crochet stitch to make it more ribbed/stretchy than a regular plain single crochet stitch. For those of you now wondering "WTF is this crazy lady talking about?!", let me explain. Normally when you crochet, you pass the hook under both strands of the previous single crochet stitch (under the V). To make a ribbed surface, you only pass it under the back strand (into the V). Clear as mud? Great. I found that doing it this way made it a little stretchier, which is great for growing heads. Plus, ribbing just looks cool.

And now, the pictures. First, the finished hat:


Second, the hat being modeled by my darling daughter, Eliza:


The perfect hat to keep little noggins warm!
Wednesday, April 23, 2008

And now for something completely different!

So, my first two projects posted on this blog have been perfectly sweet, innocent and child-friendly. Oh look, a cutesy sweater, and a dress-up crown! Awwwww. Can't you just feel the warm fuzzies?

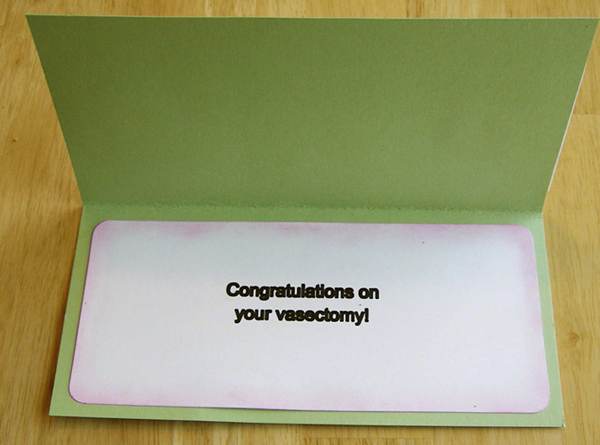
This is the result of one of my latest adventures in cardmaking. A friend posed a challenge, to make a twisted and demented card. This is what I came up with:


Stamps: SU Very Punny, A Little Love, Year Round Fun II
Paper: SU Certainly Celery, Pretty in Pink, Very Vanilla, Really Red, misc patterned paper
Other: VersaColor black ink, SU pastels, round corner punch, QuicKutz Silhouette w/ pen attachment

Ok, so it really wasn't that bad. I do plan to give it to someone though! I'm just waiting for the perfect opportunity.
Tuesday, April 22, 2008

Fit for a Princess

Ahhh, felting. Beautiful, yet nerve-wracking. How hard it can be to spend hours upon hours knitting up a project, just to throw it in the wash and shrink it intentionally. It can be so hard to let go, to put your hard work into that washing machine, close the lid and start the hot wash cycle, and wait for the agonizing 20 minutes to see if your project survived.

Now that I've done it though, I am hooked. Felting is the neatest process. I started pretty easy, with this felted crown, a freebie from Lion Brand Yarn (you will have to register or log in to access the pattern). I used Lion Wool Yarn (perfect for felting!) in Goldenrod.

Here is the project before felting:


After felting:


And finished:


I had to wash mine on hot twice to get the desired amount of felting. Once wasn't quite enough. I opted not to run it through the dryer though, it shrunk enough! While it was damp I was sure to pull it into the shape I wanted, and then I let it dry. The pattern suggests using a hook and loop closure on the crown (think velcro). I figured velcro + felt = disaster if it ever came undone, so I opted for a pair of 7mm snaps that I just hand-sewed on with a sharp needle and a golden thread. Voila, a crown fit for my little princess.

Monday, April 21, 2008

Two Cute!

No one in my family knits anymore. Way back in the day, my grandmother used to make the itchiest damn sweaters for us kids to wear. They were hot, thick, and if we wore them much beyond Christmas Day, it was probably only because it was -40 outside and we needed the layer. When I decided recently to take up knitting, I swore I would never make one of those dry, itchy, heavy sweaters for my kid.

I came across this pattern in a cute book I picked up somewhere along the way (probably Michaels?) called Hip Knits. Truth be told, it's not an amazing book full of super-awesome patterns, but there are some gems in there, and this is one of them. This pattern is the Cotton Candy Jacket on p.58. This was a fantastically easy sweater to make - if you can knit (or purl), you can make this sweater. It's all garter stitch, and knitted up on big needles too. I don't remember how long the large one took, but the small one I was able to knit up in less than 2 days. I would have finished it completely in those two days if I hadn't needed to make a trip to the dreaded Wal-Mart for buttons.

I did make a few small changes to the original pattern, which I will summarize:
  • The pattern called specifically for Lion Boucle in Sprinkles. I opted for something a little darker, and used Hard Candies (large) and Popsicle (small)
  • I used three smaller buttons instead of one large. I found that a big button required significant force to fit between the stitches (as there are no buttonholes), so smaller ones were required. And one just looked weird, so I used three!
  • I decided to forgo the hood altogether. Where the pattern instructs you to pick up the necessary stitches and knit the hood, I did two rows of knitting straight across. That served to pull the shoulders and neck together, and create a teeny bit of a collar. As a result of skipping the hood, both sweaters required one skein less yarn than the pattern calls for.
And now, the pictures. First, the large one (size ~12 months):


Second, the small one (size ~newborn to 3 months):


And lastly, the larger one in action, on my little girl at the park:

In The Beginning

Welcome to the beginning of That Crafty Chick! Craft blogging seems to be all the rage these days, so I'm all over this bandwagon like a donkey on a waffle. I have a few projects finished, photographed and ready to blog, I just have to find time away from my 10-month old monster to actually do something about it.

I've been crafting since I was a wee kid. One of my earliest memories is painting ceramic christmas ornaments with my grandmother when I was 2 years old. I have a huge collection of knicknacks and god knows what else, things that I made in school, at Brownie camp, just because. This trend has continued on into adulthood - I have since taught myself to cross-stitch, quilt, knit and crochet, and I've started dabbling in the world of papercrafts. It's an expensive addiction that my husband groans about every time I make a trip to Michaels, but at least he appreciates the results.

So, hopefully I can stick to this blogging thing. I love crafting and I would love to share my creations with anyone bored enough to read this for an insomnia cure.

Happy crafting!
 

Blog Template by YummyLolly.com