Friday, December 19, 2008

The End of the Christmas Cards

So, it's December 19, and what did I do last night? That's right. I finished my christmas cards. Where the hell did this month go, anyway? Thankfully 95% of the people I still have to send cards to are local, so even though I popped them in the mail on my way to work this morning, they should still arrive before the 25th.

This card was sort of a "WTF can I do with very little effort" deal, and I managed to sucker my husband into helping. I wanted something that was neat but simple - no colouring, no ribbon-tying, no using scissors to cut anything, no heat embossing, just layers of colour and a simple assembly. I am not 100% sold on the snowflake in the scallop circle embellishment, but at 8pm on a cold Thursday, I wasn't about to go out in search of something better! So, here it is!


The ingredients:
- Paper: SU Whisper White, Bashful Blue, Close to Cocoa
- Ink: SU Bashful Blue, Close to Cocoa
- Stamps: SU Happy Everything, unidentified SU snowflake (no idea what set it came from! it was an extra in an ebay purchase!)
- Other: circle punches, scallop circle punch, scallop edge punch, Cuttlebug Snowflakes embossing folder
Sunday, December 7, 2008

Christmas Kitty

For the past three years, I have faithfully gone to the Calgary Art Market & Craft Sale, and every year I am drawn hopelessly to the Old Island Stamp Co's booth like a moth to a flame. I fell in love with this adorable christmas kitty, it's perfect for holiday cards!

The ingredients:
- Paper: Misc kraft brown, SU Whisper White, Old Olive, Ruby Red
- Stamp: Old Island Stamp Co Christmas Cat (732-D)
- Other: Green ribbon (Michaels), corner rounder punch (for the scallops), ticket corner punch, SU Watercolor Wonder crayons, D'Vine Swirls embossing folder
Sunday, November 30, 2008

The Christmas Dress

I know, I know - Halloween comes before Christmas and I have yet to blog about her costume. I keep meaning to, but I want to toss a little dyeing tutorial on that post, and I haven't gotten around to deciphering my chicken-scratch notes on exactly how I created her wings, so it's going to have to wait for another day.

I have been on a real sewing kick as of late, as those of you who talk to me regularly will have noticed. For me, sewing is a source of great pride and satisfaction, and also one of great frustration. I have a wonderful habit of getting myself in over my head, and usually on something "big", like say, a halloween costume or a holiday party-dress for my daughter. The pajamas and little catnip mousies? A breeze!

My biggest source of frustration right now is my sewing machine. It's an oldie (read: older than me!), and it still runs well. It does a straight stitch and a zigzag stitch, it goes forward and back. It does not do anything else, and I have only the standard foot for it. For the most part, this is not a problem. I don't need all that fancy stuff. But for a holiday dress? Yeah, it's a problem. Without a zipper foot, it is impossible (for me) to install a zipper. And it doesn't do buttonholes, either. And of course, I had to do my usual over-estimating of my abilities, and pick a pattern that required a zipper. As a result, I redesigned the shoulders of the pattern so that it had a flap that came over and buttoned, so that I could actually squeeze my daughter into this dress without a zipper up the back. Let it be known, making major structural alterations to a pattern is generally NOT a good idea for the amateur sewer. It can often result in much hair-pulling, seam-ripping, and exclamations of many creative curses. And did I mention that failure was not an option? My husband was not about to let me brave the malls in search of an alternate outfit, and next weekend is the party that the dress was being made for. Good times, good times.

But, I have prevailed! And the dress is quite cute, if I do say so myself. I do think that it could use to be hemmed an inch or so, but my husband disagrees, and says that it is perfectly cute as-is. Because I am so sick of working on this dress right now, I am inclined to agree! Please ignore the grey long-sleeved tee that she is wearing underneath - we will be picking up either a red, burgundy or black turtleneck for her to wear with this dress, and a pair of white tights with little black mary-janes.

Friday, November 14, 2008

Couldn't you just DYE? (also, where have I been?!)

It's been a long, long time since I've looked at this crafty blog. Too long, in fact. Where have I been? I've been around, still crafting a little but not so much desiring to blog about it. To make a long story short, my maternity leave ran out in June, so I found a dayhome for my daughter and I am back to the Monday-to-Friday grind. I love my job, but it has left me with far less time to craft, much less take, process, and post pictures, then write up a little blurb to go with it. Now if only someone would actually pay me good money for this crafty crap I do...

My latest project was inspired by Eliza's halloween costume. She was a monarch butterfly, but Fabricland's pathetic choice of tulle colours (no orange? seriously?) left me with only one choice: dye my own. (Her costume is going to be the subject of a future blog post, I promise!) Custom dyeing was a challenge that I actually really enjoyed, so I decided to take on a bigger project.

These are playsilks. Some of you may be familiar with them, but for those who are not, they are little more than a square habotai silk scarf. They are meant to encourage creative pretend play in children - a playsilk can be a doll blanket, a cape, a tablecloth, a hammock, or just something to swing around like crazy. Eliza is just getting to the age where she'd really be into these kinds of things, too. I'd seen them all over etsy and various other stores for obscene prices and thought "I can do that!", and after the tulle incident, I really believed that I could! I found a supplier that shipped to Canada, ordered all I needed, and this was the result:


I used Jacquard acid dyes, which are pretty simple to use, but a little finicky. And let me tell you now - when the instructions say that vinegar is necessary, they mean it! I had to re-dye two of these batches because all the dye washed out in the post-dye-washing. Bah.

Now, can I really hold off 'til Christmas to give these to her?
Tuesday, May 20, 2008

The Great Conversion Project

Take one love of rubber stamps, and add a crazy desire to actually start collecting awesome sets. Cut with a little bit of no space in the craft area. What does this leave? An insane project to convert all my stamps to a vinyl cling system. I suppose it's not that insane - I really don't have a lot of stamps to convert compared to some of my friends. But it's proving to be quite the process nonetheless! The little stamps are the hardest, having to make such tiny snips through the foam and rubber, argh! On the plus side, this allows me to re-trim stamps that weren't trimmed very well in the first place!

So, what is this vinyl cling system? It's genius, really. Instead of permanently mounting my stamps onto wooden blocks, I am adhering a layer of vinyl cling to the foam on the sticky side. The vinyl has enough static charge to temporarily adhere to an acrylic block. For sets like Stampin' Up that come with the rubber dies already attached to sticky foam, I just use vinyl cling. For stamps that are rubber-die-only, I use a product called EZ-Mount, which is a foam layer with adhesive on one side and vinyl on the other. I used EZ-Mount a lot for converting stamps that were wood-mounted previously, because it was easier to get the rubber off the foam than to get the rubber and the foam off the wood.

For storage, I am opting to use a binder system rather than the popular CD-case system. Most unmounted stamp sets fit nicely into a regular CD jewel case (not the slim kind), but I decided to purchase hole-punched acrylic sheets to store my stamps in a zip-up binder. I'm not sure how well this will work out in the long run, I may yet switch to CD cases as I'm already filling up my second binder.

I plan to post a tutorial on precisely how I decided to attack this project at some point. For those who are visual in nature, I have made sure that I have photographed the process from beginning to end, so it all makes sense.
Saturday, May 17, 2008

A neat little trick

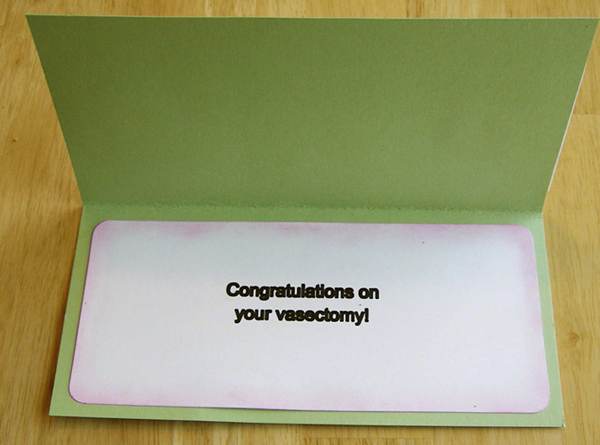
In my card show-off post yesterday, the recipe for the card includes silver brads and pearl embossing powder. I was tipped off by another poster on SCS that embossing is a really good way to change the look of the same ol' plain boring brads that you have sitting around. If you're like me, you may have purchased a pack of 100+ brads when your project only called for a few, and are now sick and tired of using the same colour on your projects. Well, here's something you can do! I even took pics, for those who are visual in nature.

First, collect your supples. You will need brads (obviously!), a heat gun, embossing powder, clear embossing ink and tweezers. I recommend a pad like VersaMark for your ink. The bingo-dauber style is a lot harder to use on the teeny brad heads.

Pick up a brad with your tweezers, and press the head into the embossing ink. I tried to only get it on the head, since the prongs are hidden anyway.

Next, dip it in embossing powder. Tap off the excess.

Finally, heat that baby up! If one coat isn't enough, repeat the ink-powder-heat steps again. If you're fast enough off the heat, you might be able to just dip it straight back into the powder and skip the ink. Be careful to let the brad cool for 15 seconds or more before touching - it's HOT! And the powder doesn't dry as fast as it does on paper, so you may fingerprint it. If you do smudge or fingerprint the melted embossing powder, just heat it again and it'll smooth over.

If you want to do sparkly glitter brads, the glitter embossing powder is just the solution! You may wish to do a coat of a metallic or pearly powder before you do the glitter coat(s), as many glitter powders are transparent and don't have the same coverage as a regular full-coverage powder.

Here are my sample brads. All four started out as plain silver. From left to right, they are covered in: gold powder, copper powder, white pearl powder + kaleidescope glitter powder, white pearl powder + silver glitter powder.

As you can see, they don't have the same super-shiny finish as a metal brad does, but it looks pretty cool regardless. The photos don't really do justice to how nice they really look on a card!
Friday, May 16, 2008

Little Brown Bird

Since my Apples & Oranges note cards turned out so well, I decided to try another design that I had floating around in my head. Like many other cards I've made recently, this one also features the Always stamp set from Stampin' Up. I never would have bought this set if it weren't for a friend making the most amazing cards with it. I'm glad she inspired me, and pleased to have this set in my collection! I was thinking that a set of 6 of these might be nice to sell on etsy, if I ever get around to it!


Stamps: SU Always
Paper: SU Bashful Blue, Close to Cocoa
Ink: SU Close to Cocoa
Other: Silver brads, white pearl embossing powder, Cuttlebug and Birds & Swirls embossing folder, ticket corner punch, Stampin' Dimensionals.
Thursday, May 15, 2008

Confessions of a Yarnaholic

I'm addicted to yarn. Alpaca, wool, mohair, angora... the softer, the better. Natural colours, bright colours, heathers, stripes, hand dyed... the list goes on. My stash seems to be expanding by the day, and there is no end in sight. At first I started out buying only what I needed for whatever project I planned to start immediately. That quickly turned into buying yarn for projects I tentatively had in my queue. Now? I'm *thisclose* to buying yarn just for the sake of buying yarn. Eeeeee! Somebody stop me!

A few nights ago I decided to make a trip to my local yarn store. As soon as I walked in, I knew it was a mistake to actually go into the store instead of ordering online. There was shelft after shelf of beautiful, luxurious yarn in every fiber, weight, and colour you could ever imagine. It took some serious effort to buy only the three skeins of wool that I intended to use in the near future, and not stock up on piles of beautiful yarn. What would I do with it? Who knows... it just looks like it would be fun to pet. Or maybe buy enough to fill a ball pit, and roll around in it. I did it though, I bought only what I "needed". Which, incidentally, is three skeins of lovely 85% wool 15% mohair from Lamb's Pride:


The first one is Kiwi, the second is Grey Heather, and the third is Blue Magic. I'm hoping to knit some fingerless mitts for myself, my mother-in-law and my mother respectively. I just have to learn to knit in the round with double-pointed needles, since this project is too small for circulars!

For anyone reading this that's interested in yet another place to pad your yarn stash, check out Make 1 Yarn Studio. They're located fairly centrally here in Calgary if you actually want to go in, but the website has all their yarns for sale, and they offer free shipping on orders over $50. Wow!
Wednesday, May 14, 2008

I'm on a roll!

This is what happens when my baby naps for several hours at a time. I make cards. It's difficult for me to work on this while she's awake and demanding of my attention, so while she's out for her morning nap, I decided to tackle the latest card sketch challenge up at SCS.

No real purpose in mind for this card, though I'm sure I can find someone to give it to. Until then, it'll be filed with the others that have no immediate use!

Stamps: SU Always
Ink: SU Elegant Eggplant, Old Olive
Paper: SU Elegant Eggplant, Old Olive, Whisper White
Other: Cuttlebug w/ Birds & Swirls embossing folder, Boss Gloss clear embossing ink, clear embossing powder, circle punches, ticket corner punch, Michaels green velvet ribbon, brads
Tuesday, May 13, 2008

Like Apples and Oranges

Wow, I'm on a cardmaking spree, aren't I? I recently purchased SU's Tart & Tangy set, and after much pondering, I came up with the perfect project for it! These are 3x3" note cards. I made a set of 12 (6 of each), and I'll probably give them to my husband's grandmother for her birthday next month. I had enough paper to cut enough to make a second set, perhaps a gift for my mother-in-law? Now I just need to find a creative way to wrap them up!

The "opposite" effect was intentional, as the title says, like apples and oranges!


Stamps: SU Tart & Tangy
Ink: SU Only Orange, Green Galore
Paper: SU Whisper White, Only Orange, Green Galore, Pixie Pink
Other: Corner-rounding punch, scallop punch, circle punches, Cuttlebug & D'Vine Swirls embossing folder

Another day, another challenge

Another crafty girl I know posted a card sketch challenge over on her blog, and I couldn't resist. Now that my crafty space is all nice and neat and organized, I am all full of ideas! This card will go into my drawer of cards for future occasions yet to be determined, though I may give it to a friend getting married later this year.

Stamps: SU Always
Ink: SU Brocade Blue, Chocolate Chip, River Rock
Paper: SU Chocolate Chip, Brocade Blue, Whisper White
Other: Cuttlebug & D'Vine Swirls embossing folder, Making Memories brads, Scallop punch, circle punches, Michaels velvet ribbon.
Monday, May 12, 2008

Hoppy Birthday!

I got myself inspired to make some cards this morning when I realized that my Stampin' Up watercolor crayons were still in the shrink-wrap! I figured that if I'm even remotely able to justify the cost of all these supplies to my husband, I'd better us 'em. Conveniently, a new technique challenge was posted on SCS this morning, challenging stampers to combine an embossed image with watercolours! So, I picked a cute little frog and a matching toadstool, and whipped up this card:


Inside is stamped "hoppy birthday!" I'm not sure who I'll give this to, but I'm sure someone I know will be having a birthday soon!

Stamps: SU Unfrogettable
Paper: SU Real Red, Old Olive, Whisper White, misc orange
Ink: VersaColor Black
Other: SU Watercolor Crayons, Aqua-Painter, misc ribbon, Making Memories Brads
Friday, May 9, 2008

Brain Slugs!

I stumbled across this pattern by NeedleNoodles in her etsy shop quite by accident. I was looking at crochet food patterns, and I just happened to notice the pattern for these cute little suckers for sale as well! Being new to this whole crochet thing, these seemed like a good place to get started. This is a pretty simple pattern - once you get the hang of the "magic ring" at the beginning (which still takes me a few tries to get it right sometimes!), you're golden. Attempting to crochet with a small child who likes to "help" can be distracting, however. I found a simple way to remind myself of where the circle begins & ends - a safety pin! If you have trouble counting, get distracted easily, or are likely to have to put your project down in the middle of a round, a safety pin is the perfect answer. Stick it in the last stitch of the previous round, and off you go! As long as you know what row you're on, it's all good.

So, back to the brain slugs. I opted to make these in a less vibrant yarn than suggested in the pattern, simply because it's what I happened to have on hand. I think they're cute, but if I were to make them again (and I will!), I will use a brighter palette. I also decided to pass on the button or safety eyes and use black yarn in a french knot instead, as these are a gift for a young child with a sibling due to arrive very shortly. I wanted there to be no choking risk whatsoever with these little dudes!


Yarns used are Red Heart Super Saver Red in Ranch Red and Aran, and Lion Vanna's Choice in Black, Pink, Pea Green, Mustard, Colonial Blue and Antique Rose.

I definitely have to keep these little guys in my queue, I think I need to make a set for Eliza!
Thursday, May 8, 2008

Bugs and Kisses!

One of Eliza's little friends is turning 2 years old this weekend, and I just realized today that even though I finished making her present, I had totally forgotten about a card. Oops! I sorta had a design in the back of my head, so it was just a matter of finding the perfect paper and putting it all together. I had originally been looking at this design by Kaleen on SCS, but as I began working on the card, I ended up changing an awful lot. This is quite often how I do a lot of projects - stalk someone else for inspiration, and then run with it!

Here's the finished product:


Stamps: SU Bugs and Kisses
Paper: SU Bordering Blue, Chocolate Chip, Certainly Celery, Whisper White, misc purple, Deja Views Blue Raspberry Stripes
Ink: SU Certainly Celery, Chocolate Chip
Other: SU scallop circle punch, 1 1/4" punch, 1" punch, 1/16" punch, corner rounder, VersaMarker, clear embossing powder
Tuesday, May 6, 2008

Stealing part of my inheritance

Visiting with grandma is always fun, but visiting and bringing home a stash of yarn? Even better. My grandmother used to be an avid crocheter back in the day, but claims she hasn't touched a project in several years. My last visit involved stealing two boxes of fabric scraps for quilting, and this time she pulled out a huge (and I mean huge) box of yarn from her closet, and shoving it in my direction. She would have been plenty happy for me to just take it all, but limited space in the vehicle on the way home meant that I was only able to snag a couple bags full on this trip. No one else in the family knits or crochets, so if I don't take it, no one else ever will. I know it makes my grandmother happy that at least someone is continuing the hand-crafting tradition.

Most of her yarn is acrylics and acrylic/wool blends, and a great deal of it in small balls of leftovers from projects long past. This stuff is absolutely perfect for toys and other small-ish projects that I would like to work on. I was particularly inspired to do a crazy granny-square afghan for my daughter, with no real colour scheme, just a hodge-podge of whatever I decide to throw together. I love cuddling up under a hand-made blanket with a bowl of popcorn and a movie, and I think it would be a lovely heirloom to hand down to her when she's old enough to appreciate it - an afghan from her great-grandmother's stash.
Sunday, April 27, 2008

Thank You, Thank You

I've done enough knitting and crocheting in the past couple of days, I decided that today it would be time to play with some paper. I am part of an exchange coming up, and the theme is "thank you / congratulations", so I had to come up with something to fit one of those messages. At first I intended to make a masculine-hued congratulations card, but my idea just didn't pan out. So, it turned into a thank you card instead. I'm not even sure it's all that masculine, what with the flowers and all, but I think I like it anyway. I'm really diggin' the retro brown-blue-olive-mustard colour scheme though, I like how it doesn't really match, but it still works together. And the velvet ribbon is the perfect finishing touch.

I think I'm happy with the result. I may tinker with it a bit more for the final exchange version, but I'm at least pleased with my prototype!


Stamps: Stampin' Up Enjoy Every Moment
Paper: SU Chocolate Chip, Old Olive, misc white, Deja Views Small Polka Dots.
Ink: SU More Mustard, Old Olive, Bordering Blue
Other: Corner rounding punch, ticket corner punch, brown velvet ribbon, misc eyelets, SU pastels
Friday, April 25, 2008

Ahhh, Organization! Part I

Those who know me know that I am not exactly the most organized person in the world. I toss things in piles, bags, drawers - anything to just get it out of the way when I'm tidying up. This resulted in a huge, and I mean HUGE mess when it came to my knitting and crocheting. Yarn and needles and hooks every which way! I had no idea what I had, and looking for it became an ordeal. And my husband, being thrifty, forbade me to buy anything remotely knitting- or crocheting-related until I sorted out the mess. He feared (and rightly so) that I would just buy what I already had, because I had no idea what I had already bought. Smart man.

So, I organized. I'm still in the middle of organizing my yarn and patterns - that will be a blog entry for later - but first I wanted to share what I started working on last night, and miraculously finished this morning. I spent the better part of my afternoon yesterday looking at needle & hook storage solutions on ebay, etsy, and several other sites that came up with the help of Google. I found a couple patterns, several pictures, and a truckload of inspiration. So, I went to work, and this is what I finished!


It will hold several pairs of needles, and the bottom pockets are wide enough to store other accessories. I have my crochet hooks in it for now, but I have plans to make another smaller holder specifically for them. That's on my to-do list.

I can't take full credit for it - I did base it mostly on some stuff that I found while googling around, particularly the pocket placement. And it does look an awful lot like the ones I saw for sale on etsy. It's not perfect, either - I made several mistakes (thankfully all not noticeable!) while making it, and made some notes on what I need to do differently to perfect it. All in all, it was a good start, is functional and pretty, and I will surely make more to give as gifts, and possibly even a few to sell.
Thursday, April 24, 2008

All Warm & Fuzzy

Hi, my name is Samantha and I am addicted to making cute things for my kid. And my friends' kids. Really, anyone under the age of 12. This is another freebie pattern that I picked up somewhere in my travels, and absolutely count not resist trying. It's super-duper easy, and crochets up in a flash. The only problem I found was that you switch colours every single round, so that's a lot of yarn hanging around on the couch with you that is at eye-level for curious children and cats. Several times I had to fend off sticky fingers and poking paws whilst finishing this up!

So, the details of the pattern. It's a freebie from Bernat, the Cute Kids' Earflap Hat (registration required to view the pattern). This one was done in Bernat Softee Chunky in Hot Pink and Hot Lime. I did it pretty much word-for-word, with the exception of changing up the colours, and doing a two-colour tassel instead of one. The one I made is a size 2/4, and it's not too terribly large on my 10-month-old, but definitely stretchy enough to fit an older child.

One thing I did do was change my single crochet stitch to make it more ribbed/stretchy than a regular plain single crochet stitch. For those of you now wondering "WTF is this crazy lady talking about?!", let me explain. Normally when you crochet, you pass the hook under both strands of the previous single crochet stitch (under the V). To make a ribbed surface, you only pass it under the back strand (into the V). Clear as mud? Great. I found that doing it this way made it a little stretchier, which is great for growing heads. Plus, ribbing just looks cool.

And now, the pictures. First, the finished hat:


Second, the hat being modeled by my darling daughter, Eliza:


The perfect hat to keep little noggins warm!
Wednesday, April 23, 2008

And now for something completely different!

So, my first two projects posted on this blog have been perfectly sweet, innocent and child-friendly. Oh look, a cutesy sweater, and a dress-up crown! Awwwww. Can't you just feel the warm fuzzies?

This is the result of one of my latest adventures in cardmaking. A friend posed a challenge, to make a twisted and demented card. This is what I came up with:


Stamps: SU Very Punny, A Little Love, Year Round Fun II
Paper: SU Certainly Celery, Pretty in Pink, Very Vanilla, Really Red, misc patterned paper
Other: VersaColor black ink, SU pastels, round corner punch, QuicKutz Silhouette w/ pen attachment

Ok, so it really wasn't that bad. I do plan to give it to someone though! I'm just waiting for the perfect opportunity.
Tuesday, April 22, 2008

Fit for a Princess

Ahhh, felting. Beautiful, yet nerve-wracking. How hard it can be to spend hours upon hours knitting up a project, just to throw it in the wash and shrink it intentionally. It can be so hard to let go, to put your hard work into that washing machine, close the lid and start the hot wash cycle, and wait for the agonizing 20 minutes to see if your project survived.

Now that I've done it though, I am hooked. Felting is the neatest process. I started pretty easy, with this felted crown, a freebie from Lion Brand Yarn (you will have to register or log in to access the pattern). I used Lion Wool Yarn (perfect for felting!) in Goldenrod.

Here is the project before felting:


After felting:


And finished:


I had to wash mine on hot twice to get the desired amount of felting. Once wasn't quite enough. I opted not to run it through the dryer though, it shrunk enough! While it was damp I was sure to pull it into the shape I wanted, and then I let it dry. The pattern suggests using a hook and loop closure on the crown (think velcro). I figured velcro + felt = disaster if it ever came undone, so I opted for a pair of 7mm snaps that I just hand-sewed on with a sharp needle and a golden thread. Voila, a crown fit for my little princess.

Monday, April 21, 2008

Two Cute!

No one in my family knits anymore. Way back in the day, my grandmother used to make the itchiest damn sweaters for us kids to wear. They were hot, thick, and if we wore them much beyond Christmas Day, it was probably only because it was -40 outside and we needed the layer. When I decided recently to take up knitting, I swore I would never make one of those dry, itchy, heavy sweaters for my kid.

I came across this pattern in a cute book I picked up somewhere along the way (probably Michaels?) called Hip Knits. Truth be told, it's not an amazing book full of super-awesome patterns, but there are some gems in there, and this is one of them. This pattern is the Cotton Candy Jacket on p.58. This was a fantastically easy sweater to make - if you can knit (or purl), you can make this sweater. It's all garter stitch, and knitted up on big needles too. I don't remember how long the large one took, but the small one I was able to knit up in less than 2 days. I would have finished it completely in those two days if I hadn't needed to make a trip to the dreaded Wal-Mart for buttons.

I did make a few small changes to the original pattern, which I will summarize:
  • The pattern called specifically for Lion Boucle in Sprinkles. I opted for something a little darker, and used Hard Candies (large) and Popsicle (small)
  • I used three smaller buttons instead of one large. I found that a big button required significant force to fit between the stitches (as there are no buttonholes), so smaller ones were required. And one just looked weird, so I used three!
  • I decided to forgo the hood altogether. Where the pattern instructs you to pick up the necessary stitches and knit the hood, I did two rows of knitting straight across. That served to pull the shoulders and neck together, and create a teeny bit of a collar. As a result of skipping the hood, both sweaters required one skein less yarn than the pattern calls for.
And now, the pictures. First, the large one (size ~12 months):


Second, the small one (size ~newborn to 3 months):


And lastly, the larger one in action, on my little girl at the park:

In The Beginning

Welcome to the beginning of That Crafty Chick! Craft blogging seems to be all the rage these days, so I'm all over this bandwagon like a donkey on a waffle. I have a few projects finished, photographed and ready to blog, I just have to find time away from my 10-month old monster to actually do something about it.

I've been crafting since I was a wee kid. One of my earliest memories is painting ceramic christmas ornaments with my grandmother when I was 2 years old. I have a huge collection of knicknacks and god knows what else, things that I made in school, at Brownie camp, just because. This trend has continued on into adulthood - I have since taught myself to cross-stitch, quilt, knit and crochet, and I've started dabbling in the world of papercrafts. It's an expensive addiction that my husband groans about every time I make a trip to Michaels, but at least he appreciates the results.

So, hopefully I can stick to this blogging thing. I love crafting and I would love to share my creations with anyone bored enough to read this for an insomnia cure.

Happy crafting!
 

Blog Template by YummyLolly.com