Showing posts with label cardmaking. Show all posts
Sunday, March 29, 2009

Worm Wishes!

Good lord, has it really been almost three months since I updated last? Eek. I have had a lot of projects on the go, but really, none of them have been fit for blog posting. On top of that, my craft area is a royal disaster. I got a new sewing machine and table at the end of January, which required some re-organizing that turned more into a piling of things in different places. Not exactly great for encouraging the crafty flow! Anyway, my daughter was invited to a birthday party for one of her little friends, so I decided to whip together this adorable card for the birthday boy! Pretty much a CASE of this card, but with a few of my own touches. I really like the shape I got for the greeting - I just cut out circles and snipped the top and bottom off to get a neat shape! I probably would have used ovals, but I don't own those punches yet so this was good enough.


The ingredients:
- Paper: SU Close to Cocoa, More Mustard, Whisper White, Chocolate Chip DSP
- Ink: SU Bravo Burgindy
- Stamps: SU Bugs & Kisses
- Other: Misc ribbon, circle punches, dimensionals
Sunday, January 4, 2009

Always My Valentine

For someone who hasn't celebrated Valentines Day since elementary school, I sure am into the v-day cards this year! I am not sure where all this inspiration is coming from. This one all started while I was organizing my multitude of Martha Stewart glitters. The Rose Quartz one just caught my eye, and I was determined to finally make a sparkly card. The rest just kind of fell into place! I am thinking of redoing this card with two hearts together, one just looks so lonely all by itself.


The ingredients:
- Paper: SU Ruby Red, Cameo Coral, Blush Blossom
- Ink: SU Ruby Red, Versamark
- Stamps: SU Always, Circle of Friendship
- Other: Martha Stewart lace-edge punch, Scallop circle punch, circle punches, Fiskars mini heart punch, SU Heat & Stick powder, Martha Stewart glitter in Rose Quartz.
Saturday, January 3, 2009

Pink Love

Now that Christmas is over and the new year has just begun, I have turned my crafty focus to the upcoming holidays. First up, Valentine's Day! I'm normally not one for hearts and pink and lacey stuff, but for some reason, inspiration has struck. This was a pretty simple card that I whipped up in less than an hour of total working time. I am not 100% sure on the colouring of the hearts - I used the various pinks from the SU pastels set, which I normally love, but it's not doin' it for me this time. If I make this card again, I may stamp the image onto some watercolour paper (if I can ever find it!) and use my ink pads and aquapainter to colour it.

The ingredients:
- Paper: SU Pink Pirouette, Rose Red, Chocolate Chip, Whisper White, Pink Pirouette DSP
- Ink: SU Basic Black
- Stamps: SU A Little Bit of Happiness (Hostess)
- Other: Martha Stewart lace-edge punch, SU Stampin' Pastels, SU Mat Pack & paper piercer
Friday, December 19, 2008

The End of the Christmas Cards

So, it's December 19, and what did I do last night? That's right. I finished my christmas cards. Where the hell did this month go, anyway? Thankfully 95% of the people I still have to send cards to are local, so even though I popped them in the mail on my way to work this morning, they should still arrive before the 25th.

This card was sort of a "WTF can I do with very little effort" deal, and I managed to sucker my husband into helping. I wanted something that was neat but simple - no colouring, no ribbon-tying, no using scissors to cut anything, no heat embossing, just layers of colour and a simple assembly. I am not 100% sold on the snowflake in the scallop circle embellishment, but at 8pm on a cold Thursday, I wasn't about to go out in search of something better! So, here it is!


The ingredients:
- Paper: SU Whisper White, Bashful Blue, Close to Cocoa
- Ink: SU Bashful Blue, Close to Cocoa
- Stamps: SU Happy Everything, unidentified SU snowflake (no idea what set it came from! it was an extra in an ebay purchase!)
- Other: circle punches, scallop circle punch, scallop edge punch, Cuttlebug Snowflakes embossing folder
Sunday, December 7, 2008

Christmas Kitty

For the past three years, I have faithfully gone to the Calgary Art Market & Craft Sale, and every year I am drawn hopelessly to the Old Island Stamp Co's booth like a moth to a flame. I fell in love with this adorable christmas kitty, it's perfect for holiday cards!

The ingredients:
- Paper: Misc kraft brown, SU Whisper White, Old Olive, Ruby Red
- Stamp: Old Island Stamp Co Christmas Cat (732-D)
- Other: Green ribbon (Michaels), corner rounder punch (for the scallops), ticket corner punch, SU Watercolor Wonder crayons, D'Vine Swirls embossing folder
Saturday, May 17, 2008

A neat little trick

In my card show-off post yesterday, the recipe for the card includes silver brads and pearl embossing powder. I was tipped off by another poster on SCS that embossing is a really good way to change the look of the same ol' plain boring brads that you have sitting around. If you're like me, you may have purchased a pack of 100+ brads when your project only called for a few, and are now sick and tired of using the same colour on your projects. Well, here's something you can do! I even took pics, for those who are visual in nature.

First, collect your supples. You will need brads (obviously!), a heat gun, embossing powder, clear embossing ink and tweezers. I recommend a pad like VersaMark for your ink. The bingo-dauber style is a lot harder to use on the teeny brad heads.

Pick up a brad with your tweezers, and press the head into the embossing ink. I tried to only get it on the head, since the prongs are hidden anyway.

Next, dip it in embossing powder. Tap off the excess.

Finally, heat that baby up! If one coat isn't enough, repeat the ink-powder-heat steps again. If you're fast enough off the heat, you might be able to just dip it straight back into the powder and skip the ink. Be careful to let the brad cool for 15 seconds or more before touching - it's HOT! And the powder doesn't dry as fast as it does on paper, so you may fingerprint it. If you do smudge or fingerprint the melted embossing powder, just heat it again and it'll smooth over.

If you want to do sparkly glitter brads, the glitter embossing powder is just the solution! You may wish to do a coat of a metallic or pearly powder before you do the glitter coat(s), as many glitter powders are transparent and don't have the same coverage as a regular full-coverage powder.

Here are my sample brads. All four started out as plain silver. From left to right, they are covered in: gold powder, copper powder, white pearl powder + kaleidescope glitter powder, white pearl powder + silver glitter powder.

As you can see, they don't have the same super-shiny finish as a metal brad does, but it looks pretty cool regardless. The photos don't really do justice to how nice they really look on a card!
Friday, May 16, 2008

Little Brown Bird

Since my Apples & Oranges note cards turned out so well, I decided to try another design that I had floating around in my head. Like many other cards I've made recently, this one also features the Always stamp set from Stampin' Up. I never would have bought this set if it weren't for a friend making the most amazing cards with it. I'm glad she inspired me, and pleased to have this set in my collection! I was thinking that a set of 6 of these might be nice to sell on etsy, if I ever get around to it!


Stamps: SU Always
Paper: SU Bashful Blue, Close to Cocoa
Ink: SU Close to Cocoa
Other: Silver brads, white pearl embossing powder, Cuttlebug and Birds & Swirls embossing folder, ticket corner punch, Stampin' Dimensionals.
Wednesday, May 14, 2008

I'm on a roll!

This is what happens when my baby naps for several hours at a time. I make cards. It's difficult for me to work on this while she's awake and demanding of my attention, so while she's out for her morning nap, I decided to tackle the latest card sketch challenge up at SCS.

No real purpose in mind for this card, though I'm sure I can find someone to give it to. Until then, it'll be filed with the others that have no immediate use!

Stamps: SU Always
Ink: SU Elegant Eggplant, Old Olive
Paper: SU Elegant Eggplant, Old Olive, Whisper White
Other: Cuttlebug w/ Birds & Swirls embossing folder, Boss Gloss clear embossing ink, clear embossing powder, circle punches, ticket corner punch, Michaels green velvet ribbon, brads
Tuesday, May 13, 2008

Like Apples and Oranges

Wow, I'm on a cardmaking spree, aren't I? I recently purchased SU's Tart & Tangy set, and after much pondering, I came up with the perfect project for it! These are 3x3" note cards. I made a set of 12 (6 of each), and I'll probably give them to my husband's grandmother for her birthday next month. I had enough paper to cut enough to make a second set, perhaps a gift for my mother-in-law? Now I just need to find a creative way to wrap them up!

The "opposite" effect was intentional, as the title says, like apples and oranges!


Stamps: SU Tart & Tangy
Ink: SU Only Orange, Green Galore
Paper: SU Whisper White, Only Orange, Green Galore, Pixie Pink
Other: Corner-rounding punch, scallop punch, circle punches, Cuttlebug & D'Vine Swirls embossing folder

Another day, another challenge

Another crafty girl I know posted a card sketch challenge over on her blog, and I couldn't resist. Now that my crafty space is all nice and neat and organized, I am all full of ideas! This card will go into my drawer of cards for future occasions yet to be determined, though I may give it to a friend getting married later this year.

Stamps: SU Always
Ink: SU Brocade Blue, Chocolate Chip, River Rock
Paper: SU Chocolate Chip, Brocade Blue, Whisper White
Other: Cuttlebug & D'Vine Swirls embossing folder, Making Memories brads, Scallop punch, circle punches, Michaels velvet ribbon.
Monday, May 12, 2008

Hoppy Birthday!

I got myself inspired to make some cards this morning when I realized that my Stampin' Up watercolor crayons were still in the shrink-wrap! I figured that if I'm even remotely able to justify the cost of all these supplies to my husband, I'd better us 'em. Conveniently, a new technique challenge was posted on SCS this morning, challenging stampers to combine an embossed image with watercolours! So, I picked a cute little frog and a matching toadstool, and whipped up this card:


Inside is stamped "hoppy birthday!" I'm not sure who I'll give this to, but I'm sure someone I know will be having a birthday soon!

Stamps: SU Unfrogettable
Paper: SU Real Red, Old Olive, Whisper White, misc orange
Ink: VersaColor Black
Other: SU Watercolor Crayons, Aqua-Painter, misc ribbon, Making Memories Brads
Thursday, May 8, 2008

Bugs and Kisses!

One of Eliza's little friends is turning 2 years old this weekend, and I just realized today that even though I finished making her present, I had totally forgotten about a card. Oops! I sorta had a design in the back of my head, so it was just a matter of finding the perfect paper and putting it all together. I had originally been looking at this design by Kaleen on SCS, but as I began working on the card, I ended up changing an awful lot. This is quite often how I do a lot of projects - stalk someone else for inspiration, and then run with it!

Here's the finished product:


Stamps: SU Bugs and Kisses
Paper: SU Bordering Blue, Chocolate Chip, Certainly Celery, Whisper White, misc purple, Deja Views Blue Raspberry Stripes
Ink: SU Certainly Celery, Chocolate Chip
Other: SU scallop circle punch, 1 1/4" punch, 1" punch, 1/16" punch, corner rounder, VersaMarker, clear embossing powder
Sunday, April 27, 2008

Thank You, Thank You

I've done enough knitting and crocheting in the past couple of days, I decided that today it would be time to play with some paper. I am part of an exchange coming up, and the theme is "thank you / congratulations", so I had to come up with something to fit one of those messages. At first I intended to make a masculine-hued congratulations card, but my idea just didn't pan out. So, it turned into a thank you card instead. I'm not even sure it's all that masculine, what with the flowers and all, but I think I like it anyway. I'm really diggin' the retro brown-blue-olive-mustard colour scheme though, I like how it doesn't really match, but it still works together. And the velvet ribbon is the perfect finishing touch.

I think I'm happy with the result. I may tinker with it a bit more for the final exchange version, but I'm at least pleased with my prototype!


Stamps: Stampin' Up Enjoy Every Moment
Paper: SU Chocolate Chip, Old Olive, misc white, Deja Views Small Polka Dots.
Ink: SU More Mustard, Old Olive, Bordering Blue
Other: Corner rounding punch, ticket corner punch, brown velvet ribbon, misc eyelets, SU pastels
Wednesday, April 23, 2008

And now for something completely different!

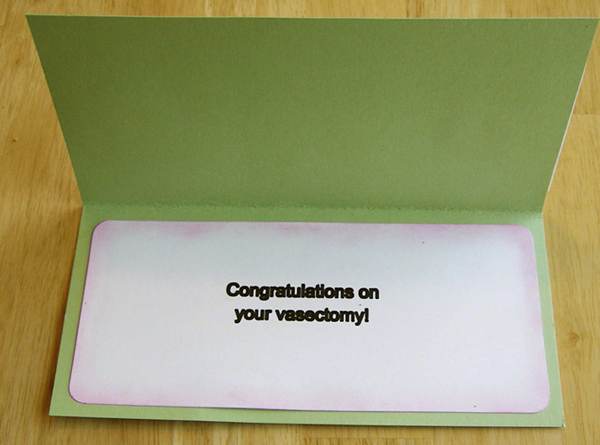
So, my first two projects posted on this blog have been perfectly sweet, innocent and child-friendly. Oh look, a cutesy sweater, and a dress-up crown! Awwwww. Can't you just feel the warm fuzzies?

This is the result of one of my latest adventures in cardmaking. A friend posed a challenge, to make a twisted and demented card. This is what I came up with:


Stamps: SU Very Punny, A Little Love, Year Round Fun II
Paper: SU Certainly Celery, Pretty in Pink, Very Vanilla, Really Red, misc patterned paper
Other: VersaColor black ink, SU pastels, round corner punch, QuicKutz Silhouette w/ pen attachment

Ok, so it really wasn't that bad. I do plan to give it to someone though! I'm just waiting for the perfect opportunity.
 

Blog Template by YummyLolly.com